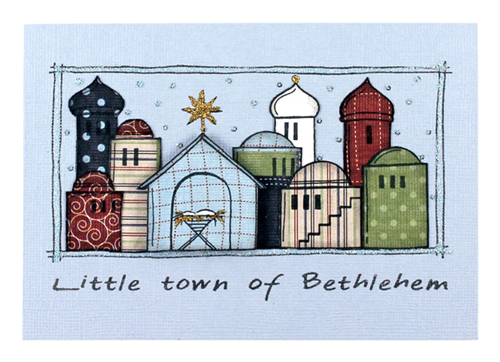
This card has a beautiful scene of the little town of Bethlehem. The scene has been made using a rubber stamp and a paper piecing method. This has then been glitzed up with some glitter glue.

What you will need to make this card:
- A6 card blank
- Light blue paper and a variety of patterned paper
- Woodware Clear Magic Stamp Single – Bethlehem
- Large Acrylic Block
- VersaFine Pigment Ink Pad – Onyx Black
- Stickles Glitter Glue – Gold
- Stickles Glitter Glue – Waterfall (Silvery Light Blue)
- Double sided sticky tape
- Sticky foam pads of 4 varying thicknesses (1mm, 1.5mm, 2mm & 3mm)
- Decoupage or precision scissors
- Craft knife, cutting mat & ruler
How to make this card:
This design will work equally well with a standard A6 card blank used tent fold style (landscape orientation) or with an actual A6 landscape card blank with the fold on the left hand side.
Cut a rectangle out of the light blue paper large enough to cover the front of the A6 card blank, stick this to the front of the card blank using double sided sticky tape.
Peel the Bethlehem scene clear stamp off of the backing sheet and apply it to the acrylic block, also apply the wording stamp from the set lining it up underneath the Bethlehem stamp. Ink the stamps using the black ink pad. Stamp the image onto the front of the card blank using a ruler to make sure it is straight.
Clean the stamps and remove the wording stamp from the acrylic block. Re-ink the stamp one building at a time and stamp each individual building onto various different coloured patterned paper. Choose a couple of the buildings in the middle row to stamp on two or three colours of paper. Stamp the four buildings in the front row each twice on their own colour of paper. Wait for the ink to dry and then cut each building out.
Starting with the furthest back buildings use double sided sticky tape to stick down each of the buildings in it’s appropriate place on the stamped image. When you stick down the middle row of buildings use the different colour papers that you stamped for two of the buildings to make them multi-coloured, similar to those shown in the picture.
Take the two layers for the four front buildings, stick one layer in their respective places using double sided sticky tape. Then stick the second layer for those four front buildings on top of the first layer using sticky foam pads. Using four different thicknesses of sticky foam pads will give the front buildings a complex 3D layered look. Use the thickest sticky foam pads for the stable so that it is more prominent, i.e. use 1mm thick for the far left building, 3mm thick for the stable, 1.5mm thick for the building on the right of the stable and 2mm thick for the far right building.
Finish the card off with the glitter glues. Use the gold glitter glue to go over the star on top of the stable, also on the straw in baby Jesus’ manger and the round ball on top of one of the buildings. Use the waterfall (light silvery blue) glitter glue to go round the border edge and also to cover all the dots in the sky.
Card idea by Woodware Craft Collection.