It’s never too early to introduce children to crafts. It can be hours of entertainment for both you and them. This snowman project is a fantastic fun craft project for you to do with your child/children and looks really effective stood on a windowsill as a Christmas decoration.

Click on this link Snowman Template to download a free printable template that includes outlines of all of the shapes you need to make the snowman up.
You will need Adobe Reader to open the template file, if you do not have Adobe Reader you can download it free from this link to the official Adobe website: Adobe Reader Download.
Other items you will need:
- Plain white card (large enough for snowman body)
- Plain orange card (for snowman’s nose)
- Black card/paper for eyes, buttons & mouth
- Brightly coloured card (for snowman’s hat)
- Strong card (for making the stand such as from a cereal box)
- Printer & plain white printer paper to print the template sheet
- Cotton wool
- 17cm length of colourful craft ribbon
- 6mm Double sided sticky tap, craft glue and/or glue stick
- Pencil & scissors
How to make:
Print the template sheet onto an A4 sheet of plain white printer paper (you may need to adjust the margin/print settings for your printer). Cut out the shapes only cutting along the solid lines and then draw round the cut outs to transfer the shapes onto the various colours of card / handmade mulberry paper. Use the white card for the snowman body, the black handmade mulberry paper (or black card) for the eyes, buttons & mouth, the orange card for the nose, the strong cereal box card for the stand and the bright coloured card for the hat.
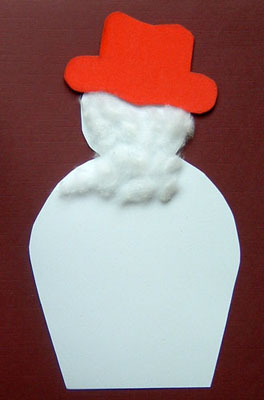
Stick a strip of 6mm double sided sticky tape across the top of the snowman’s head at an angle and then stick the hat to it.
Next shred some cotton wool into small pieces. Then spread a thin layer of glue or alternatively use a glue stick all over the body and head and stick the cotton wool evenly all over.
Use craft glue or a glue stick to stick on the snowman’s eyes, mouth, nose and buttons (leaving room for the scarf at the top of the snowman’s body). Leave the snowman to one side for the glue to dry.

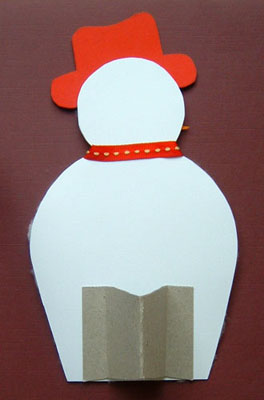
Once the glue has dried, turn the snowman over and stick the centre of the 17cm length of bright craft ribbon across the back of the snowman’s neck using a strip of 6mm double sided sticky tape.
Take the strong card stand shape and fold it in half, then fold the ends back the other way to create a flap on each end. The dotted lines on the template show where the folds should be made. Stick a strip of 6mm double sided sticky tape to each flap and then stick the stand to the back of the snowman lining the bottom of the stand up with the very bottom edge of the snowman. The sloping edge on the stand should be at the bottom.
To finish the snowman off, wrap the ends of the ribbon scarf round to the front and cross them over. Use a small drop of craft glue to stick the ribbon together where the two sides cross over.
Snowman Design and Project Idea by Janine